Wednesday, 23 March 2016

Spring Inspiration


Hooray! It is now officially spring! My favourite season! Who else is excited for those bright, sunny days and those nice walks through the park, where you can feel a light warm breeze brush past your face? You're then greeted by rows of daffodils that stand proudly ensuring that everyone knows that their season has arrived. Ah, total bliss! 

I thought I'd share with you some photos I've taken of flowers around the house, to give you a little inspiration on the different types you might want to get this spring. 

Tulips

Hiemalis begonias

Hydrangeas (my all time favourite!)

Carnations

Gerberas

Hydrangeas 

Geraniums

I don't know what this one is called! Sorry!

Chrysanthemum/Gerberas 
Kalanchoes

Phalaenopsis orchid


Wednesday, 17 February 2016

L'Oreal La Palette Nude, Beige


I was on the hunt for an eyeshadow palette with a nice selection of matte neutral brown shades. When it comes to eyeshadows, I tend to prefer neutral browns because I feel that they're perfect for a simple everyday look but then you can also smoke it up for that mysterious smokey eye look. This is where L'Oreal's La Palette Nude in 'Beige' comes in. 

It has a mixture of ten shimmery and matte shades. The shades are not named but you've got some light ones that work nice as a base and some darker ones for the crease. What I love about this palette is that five of the shades are matte which is great compared to a number of palettes out there that contain a lot of shimmers.


The mattes are smooth and highly pigmented with no fall out. They're easy to blend and work nicely together as transition colours. The shimmers especially the cream and yellow ones however are a let down to this palette, as you can see from the swatches, they are not as pigmented as the mattes. To make the shimmers more visible, you will have to layer it on or pop it on top of a matte shade. I would have to say I definitely prefer the second half of the palette compared to the first. 

The packaging feels nice and sleek. It feels sturdy and is small enough to just throw into your make up bag. The mirror is a nice size and it comes with a double ended brush, with a sponge applicator on one end and a fluffy brush on the other. I also noticed that the European packaging is different compared to the US version. I thought that was interesting so I just threw that in there. 


I have been using this palette quite often and really like it. I think it's more suitable for everyday make up looks rather than anything dramatic for special occasions.

Wednesday, 10 February 2016

Red Nails, Matte vs Glossy


As some of you may know it was Chinese new year on Monday the 8th of February and we welcomed the year of the monkey. During the celebrations you will often see a lot of red; red decorations, red clothing and red envelopes. This is because the colour red symbolises luck. As cheesy as it may sound, I decided to pop some red onto my nails.

However, I wasn't sure on whether to go for classic glossy red nails or matte nails. I recently found a new love for matte nails so I thought I'd test it out to see which looked better. I decided to go for a nice deep red berry shade by Barry M called Raspberry. As always I applied a base coat and then just one coat of the red shade. It looked amazingly glossy with one coat which I found to be pretty impressive!


I then finished with Barry M's matte top coat which left it with a nice satin like feel. I still haven't quite decided whether I prefer matte red nails or not, although I was highly drawn to how lovely they looked when they were super glossy. 

Whether matte red nails are for you really depends on what look you're going for, how long your nails are and what shade of red you like. It may look nice on a darker red but not so much on a lighter red. Or maybe red is just better off glossy? What do you think?


Wednesday, 3 February 2016

Tea Bag Trick for Broken Nails


No matter what nail strengthener you use or how careful you are, one day one of your nails will break, it's inevitable. One of my nails started to tear on the side so I looked for a way to mend it. I did a bit of research and discovered the tea bag trick and believe me this trick has helped me a lot. 

Here's what you'll need: 

* Clear nail polish/ nail strengthener

* A tea bag

* Tweezers

* Scissors


Here's what you do:

* Empty out the tea bag

* Cut out a small piece of the tea bag making sure it's big enough to cover the whole breakage and the area around it

* Apply some clear nail polish onto your whole nail and whilst the nail polish is still wet, stick the piece of tea bag onto the broken area

* Wait for it to dry

* Apply some clear nail polish onto the broken area to lock everything in

* Wait for it to dry and then apply your chosen nail colour

*Keep the tea bag for future breakages, not that we want anymore to happen.

That's it!

What's great about this trick is that you can barely see it on your nail! Whoever came up with this brilliant idea, you are a genius!

Wednesday, 27 January 2016

Matte Almond Nails


I have always loved super glossy nails however, things have changed as I have decided to go matte and I love it! I know, what a big change in life! I feel that matte nude nails look super classy and elegant. I have also been rocking almond shape nails which I feel looks great when they're matte.

Shaping my nails is the most exciting part! I have been able to keep them long and strong thanks to my trusty nail strengthening polish, 'Hard as Nails' by Sally Hansen which I have regularly mentioned in my posts. It has helped me immensely and literally lives on my nails. Thank you Sally!

Here are a few photos of each stage showing you what I do to achieve my matte nude almond nails. 


1. Bare nails

2. One coat of Hard as Nails

3. One or two coats of colour. Here I have one coat on which I find is usually enough for a nude shade.

4. Another coat of Hard as Nails to lock everything in (I do this because it hardens my nails), you can skip this stage if you applied two coats of colour.


5. Finish with one coat of Barry M's Matte top coat.

I am trying to grow my nails out longer so they'll be the full almond shape but I'll see how that goes! I'm also quite excited to see how my other nail polishes look with a matte top coat!


Related posts:

Saturday, 23 January 2016

2015 Makeup Favourites


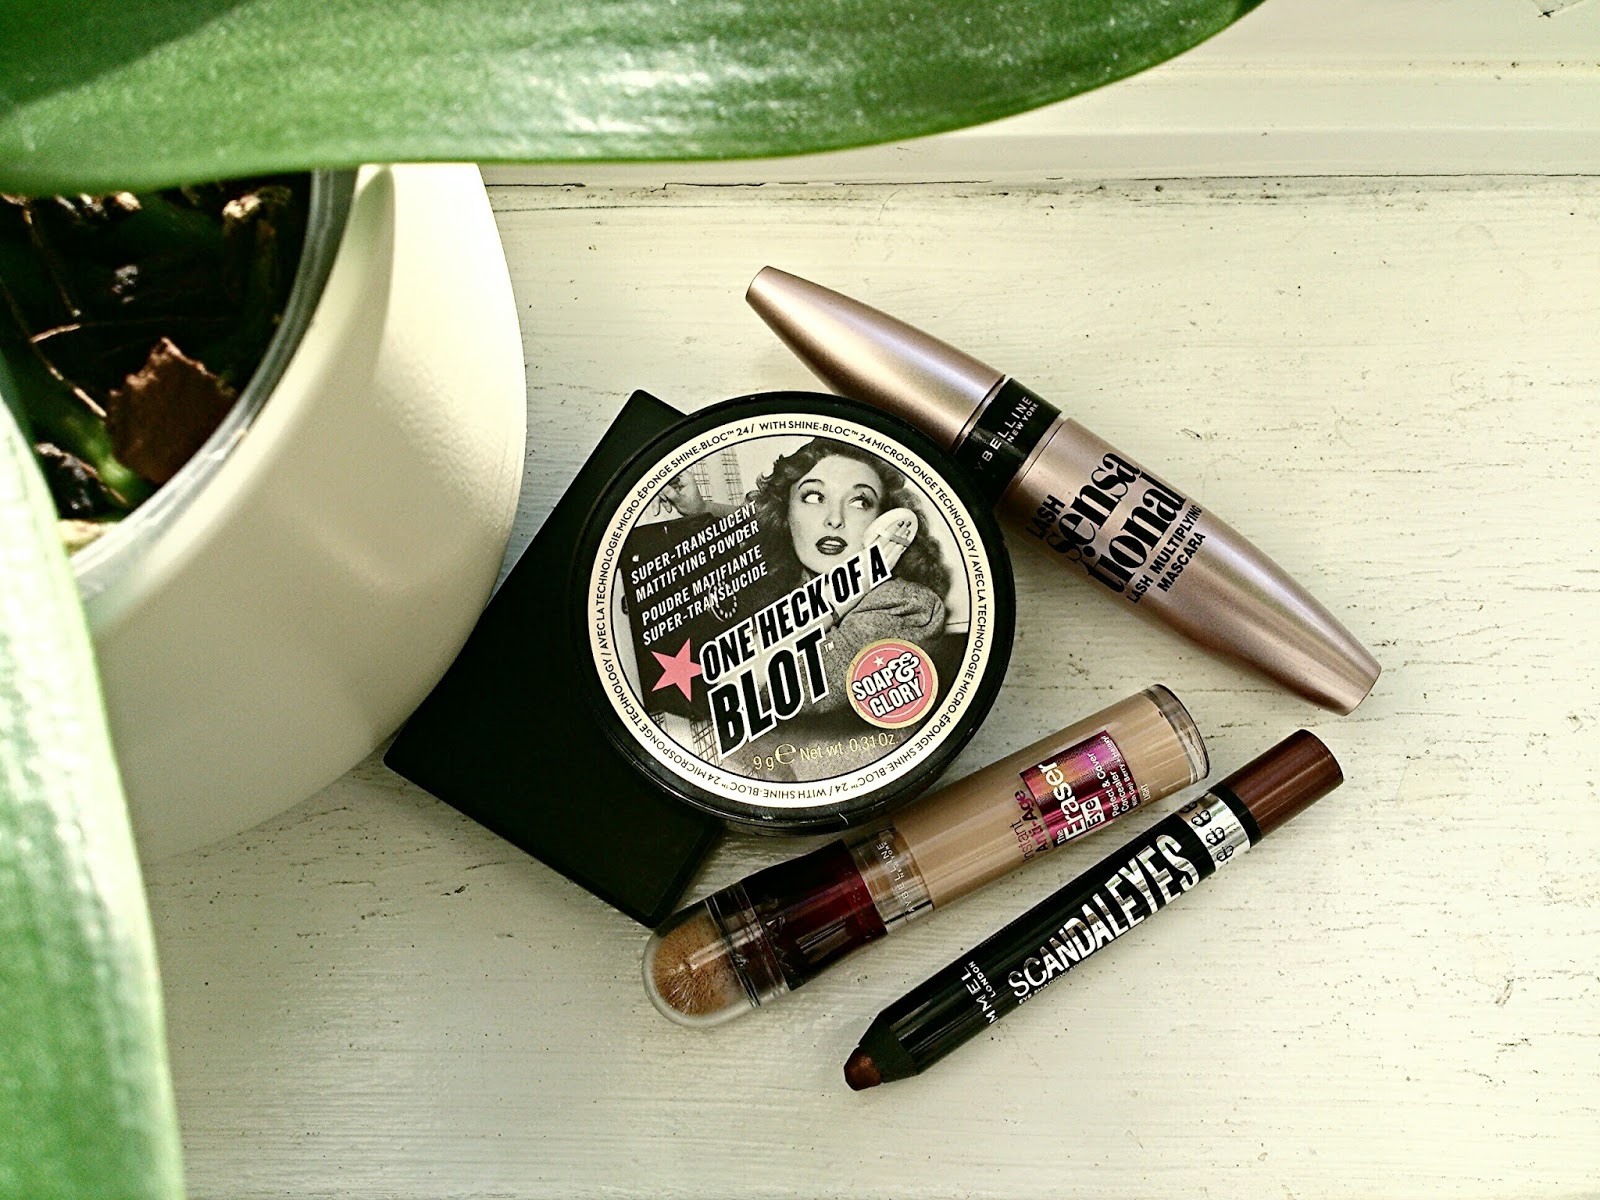
So this is my first post of 2016 and we're already speeding through the month of January, how scary is that. I've got a few makeup bits that I used throughout 2015 and will definitely be taking them with me into 2016. I'm not a huge makeup person and tend to stick to the same products if they work for me. These products are all drugstore and have been a part of my everyday makeup.  


Maybelline Age Rewind Concealer
(Light)

This has been my all time favourite concealer. The consistency is nice and creamy and easy to blend. It provides enough coverage to hide my dark circles and it really brightens up the under eye area. I also apply it on any blemishes and spots I may have, and then tap and blend it in with my fingers or brush and I'm good to go. I don't really like wearing heavy makeup on my skin for an everyday look so using this concealer alone is usually enough. This concealer always sells out fast especially in the shade 'light' so I always try to get a few extra!

Maybelline Sensational Mascara

My all time favourite mascara used to be Maybelline's The Falsies but this mascara has definitely taken its spot.  My lashes are straight lashes that don't like staying curled but this mascara really works for me. It really fans out my lashes and provides great length and volume without feeling heavy. I usually apply two coats and it doesn't go clumpy or flaky when it dries. 

Rimmel Scandaleyes Eyeshadow Stick
(Bad Girl Bronze)

I tend to go for a neutral brown slightly smokey eye look as my everyday look. I have really enjoyed using this eyeshadow stick by Rimmel as it's a quick and easy way of applying eyeshadow. I just dab it onto my eyelids and blend it out either with my fingers or a brush. I also use it as an eyeliner and then smudge it out using my real techniques accent brush which I love. The texture is smooth and the pigmentation is good. It has a shimmery metallic finish which you can build on if you wish to. 

Sleek Contour Kit  
(Light)

As you can probably tell from the picture I have been using this contour powder a lot. What I love about it is that it is matte whereas a lot of contour/bronzing powders have shimmers in them. It blends nicely and it's not too obvious but natural looking. It doesn't look orange on the skin either which is great. It also has a highlighter powder which I have barely used as I don't often highlight.


Soap and Glory Blotting Powder

I actually did a post on this powder a few months ago on why I loved it so much, you can check it out here if you want to. I am still using it and still loving it!

So that's it, those were my top favourite makeup products of 2015!